
Debug JNI Android Applications using Visual C++ Cross-Platform Mobile
With Visual Studio 2015 preview (download here) we have introduced the ability for developers to create cross-platform mobile applications with Visual C++. For the Android platform specifically this enablement includes ability for developers to create native-activity applications, dynamic and static native binaries along with a range of features to provide a fast, lean and mean edit->build->debug cycle. This blog in particular is to provide a walkthrough on how Visual Studio can be used to debug your pre-built native android applications (native activity and JNI) using the Visual Studio debugger even if you are not building with and inside of Visual Studio.
Debugging pre-built JNI Code
To demonstrate this let’s start with a pre-built JNI application package file. For this purpose in this blog we will be using the Native-Audio android application available as a part of the Android Native Development Kit (NDK) (download here). The pre-built version of this application package file along with sources is attached as a part of the blog if you would like to follow along. In this case the APK was built using the Eclipse Android integration available as a part of the Android SDK Bundle. Also note, it doesn’t really matter what toolchain you used to compile your native code (gcc or clang) as long as you are producing debug information for the APK (NDK_DEBUG=1 and android:debuggable=”true” in the manifest). With that said let’s get started!
For being able to debug this pre-built JNI android application, we need to create a dummy project which will allow us to deploy the pre-built APK using VS’s deployment engine required for a successful debugger initiation. For this dummy project let’s use the Dynamic Shared Library (Android) template.
Once a sample Dynamic Shared Library (Android) project has been created bring up the Debugging property page under ‘Configuration Properties’ (shown below).
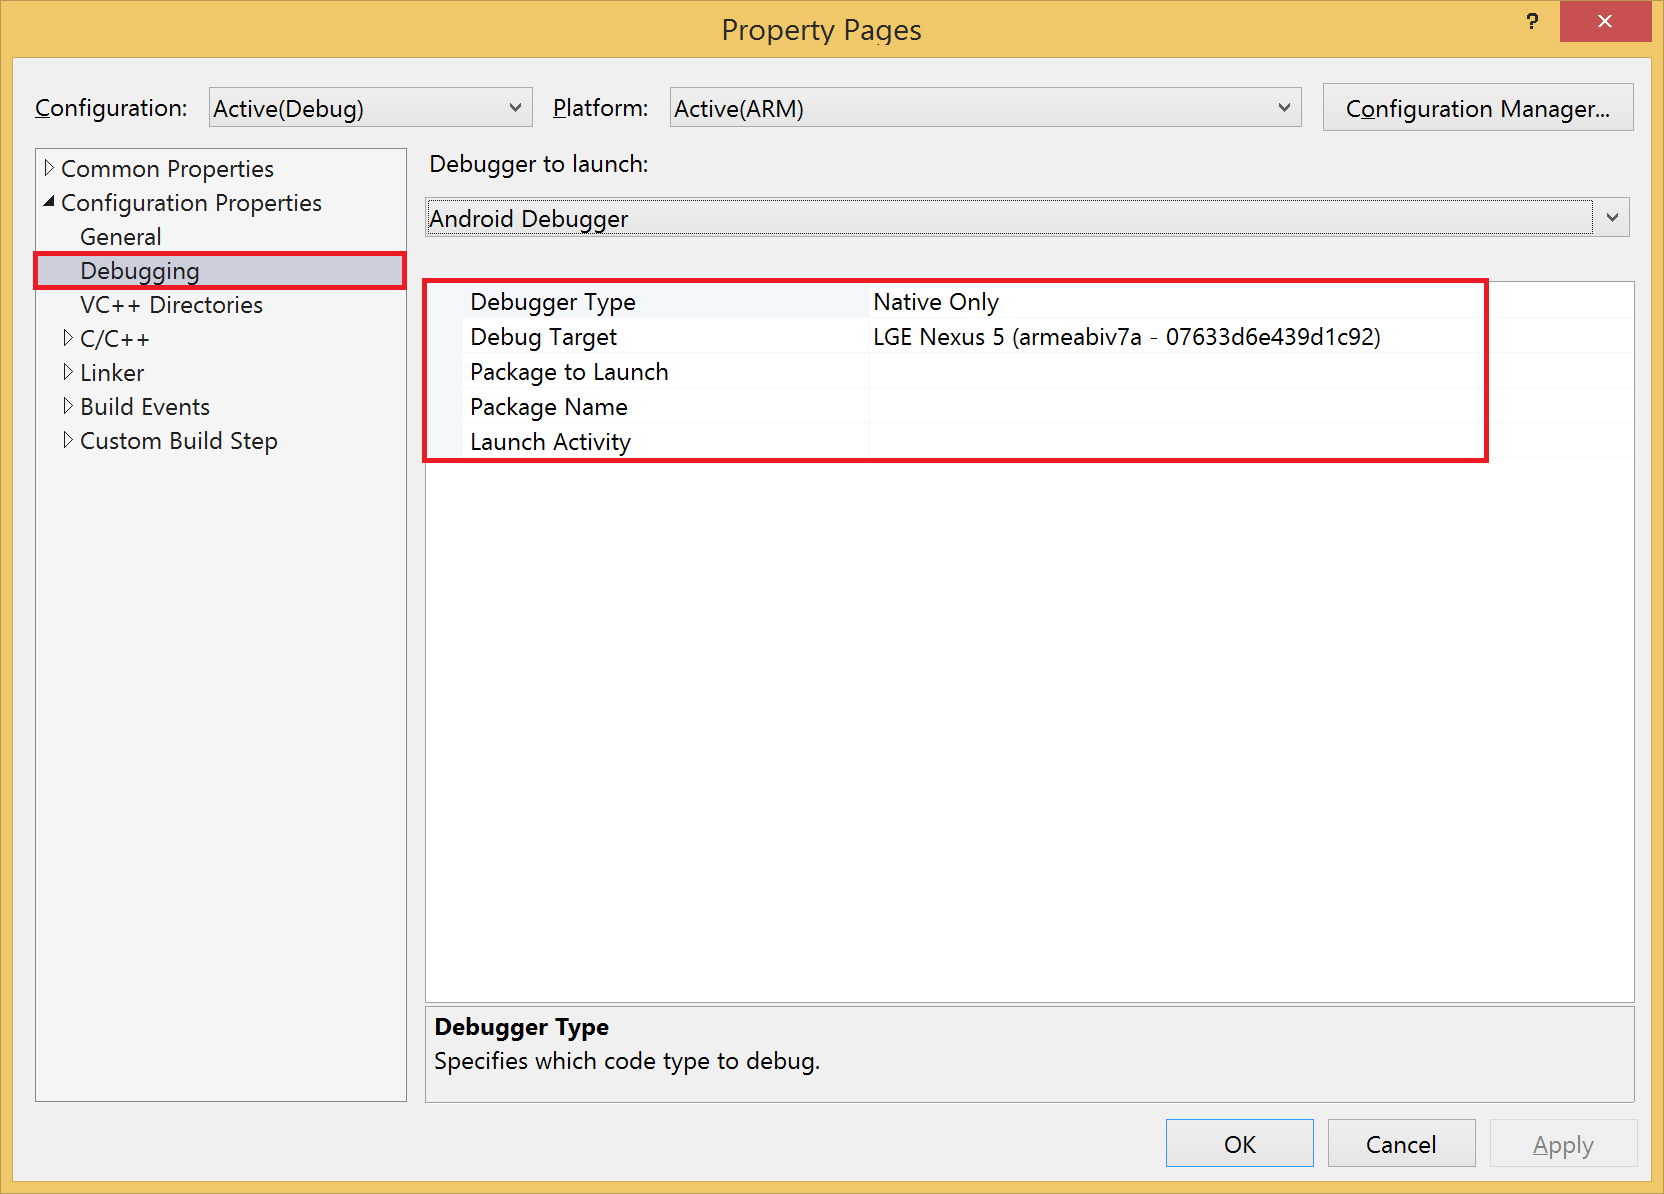
The user is required to fill in the following details,
- Package to Launch: Path to the .apk file including the .apk file name. (for e.g. C:\DebugAPK\NativeAudio.apk)
- Package Name: The Java Package name for the android application, this information can be found in the ‘androidmanifest.xml’. (for e.g. com.example.nativeaudio ). See the figure below for more details as an example.
- Launch Activity: The name of launch activity, this information can be found in the ‘androidmanifest.xml’ (for e.g. .NativeAudio).
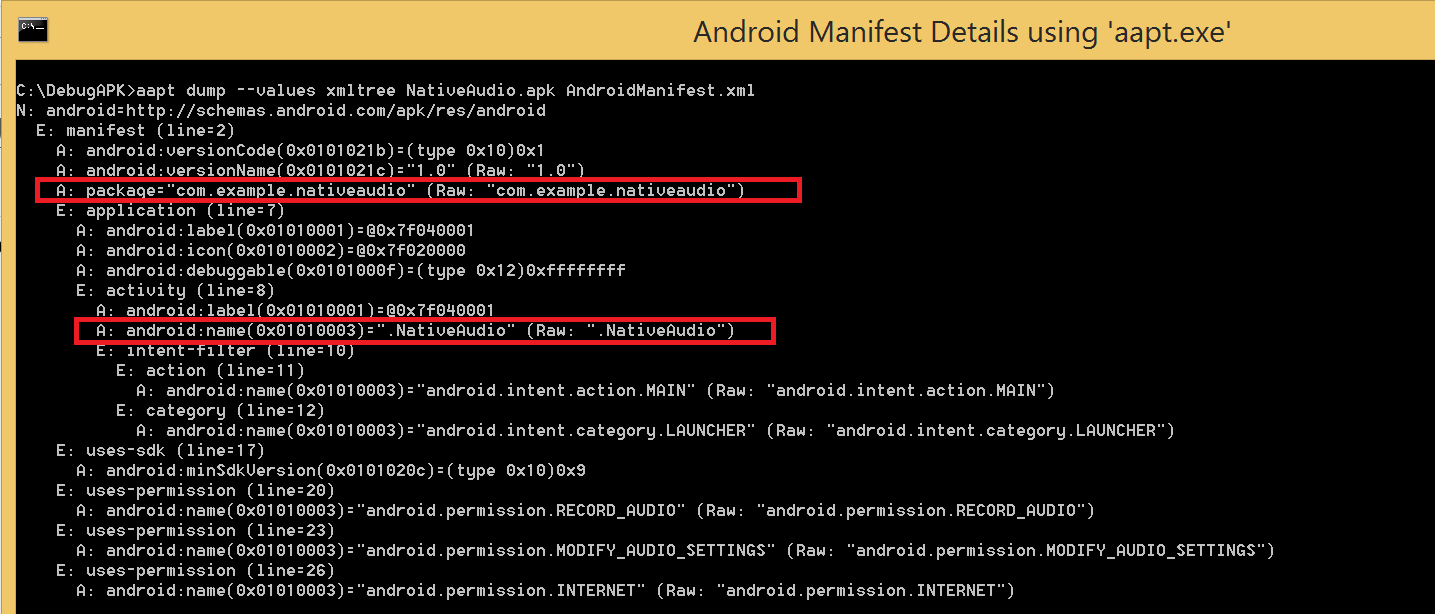
The launch activity (e.g. .NativeAudio) and the package name (com.example.nativeaudio) are both extracted from the AndroidManifest.xml (figure below) available as a part of the NativeAudio NDK sample.

If you do not have access to the AndroidManifest.xml, another way to extract this detail away is to use the aapt tool on the prebuilt .apk file. aapt can be found in the android-sdk, build tools directory and executing the following command will result in aapt printing an xml tree with values for the package and activity name.
aapt dump –values xmltree NativeAudio.apk AndroidManifest.xml
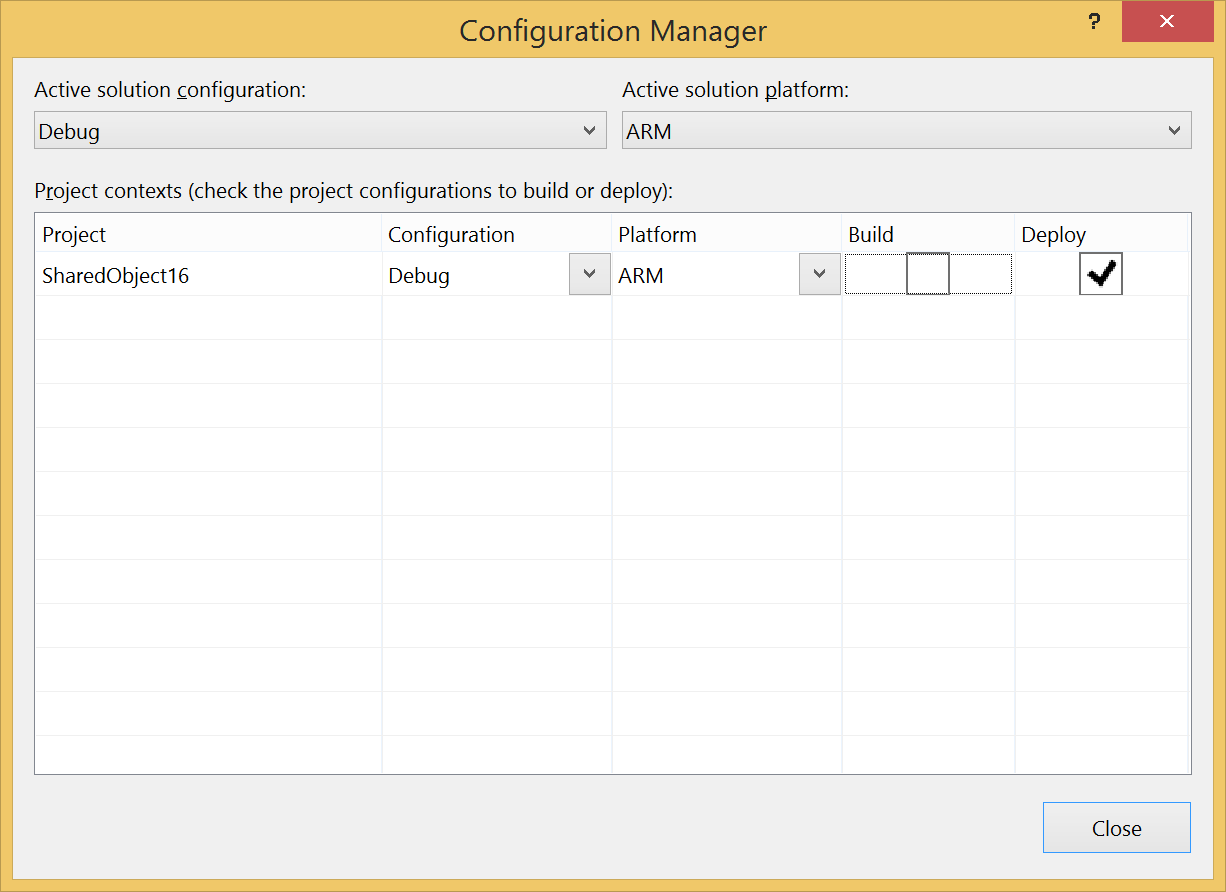
With the manifest details filled in the debugging property pages we are now set and can start debugging the native application code. For future releases we plan to automate this process and the user wouldn’t be required to fill in these details in the debugger property page. Also please note that we currently only support debugging the native portion of the source code. In order to start debugging we need set a few properties in the configuration manager.

In the configuration manager for this configuration, please uncheck the project property to build and select deploy. Once the deploy property is set, on hitting F5 the prebuilt .apk setup will be deployed to the device/emulator and the debugger will be imitated.
The last thing we need to do is to bring some source code in VS and set a breakpoint to start debugging. Just import some code into your project using the ‘add->existing item’ dialog and hit F5 to start debugging.
Wrap Up
This blog should give you working knowledge on how to use Visual Studio for debugging pre-built android application package files (.apk’s). In the future based upon your feedback we will follow up this blog post with additional posts diving deeper into key features. If you would like us to talk about a specific topic on our blogs please let us know. As a reminder the goal with this preview release is for us to collect feedback and learn from you. We are considering future support for other platforms too and your feedback is critical in shaping the direction of our product.
Sharing feedback is easy! Make feature suggestions on UserVoice, log bugs you find on our Connect site and send us a smile or frown from inside the IDE. You can also leave comments below. In addition to this if you are looking to have a directed conversation with our product team on this topic, please reach out to us through email (aasthan@microsoft.com). We would love to know more and connect with you.
 Light
Light Dark
Dark
0 comments