Creating your 1st Game (2 of 5) - by Ben Coley, Academic Developer Evangelist
Welcome back! So if I remember rightly, the last thing we did is write some basic game-play. We have a basic world, an animated game character, and some boundaries. So what next? I’m thinking a level.
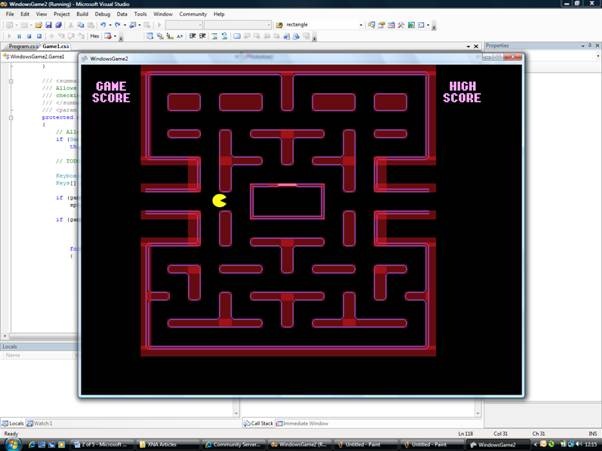
We have boundaries at the edges of the screen, but nothing inside for our character to move around in. This is where your level-design skills come in to play. Seeing as I’ve been thus far basing my game on the original Pacman-style arcade game, I’ll be using the default Pacman level. But don’t be deterred from using your own here, once I’ve walked you through the basics!
Before we begin, there’s a couple of changes I want to make to last week’s game-code, and I’ll explain why as we go along.
Firstly, the Update(GameTime gameTime) code. In last week’s code, I recalled how the original Pacman character used to move (a Pacman-sized unit at a time in any given direction), but I want to change that in our version. This is because if we use a Pacman-sized unit to move by, we can only move four possible ways, which means our level has to accommodate this (by being based on a grid-system). If we change the Pacman character so it can move one pixel at a time in any direction, not only will the movement be smoother, but also the character will be able to go to places the original Pacman couldn’t, making the level design more fun and intricate.
To make this happen, I’ve had to do a few things. Firstly, I’ve moved the following code:

...up so that it’s under the code that reads:
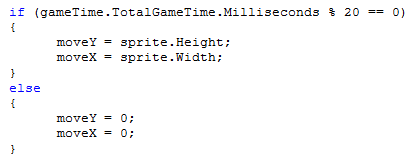
And I’ve changed it so the top of my code now reads:
What this does is makes moveY and moveX public variables, so they can be accessed from anywhere in the program.
I’ve also removed the following code:
...so that our Pacman character can move more smoothly.
Finally, I’ve changed the code inside the “foreach” loop that detects key presses. At the moment, I’ve made it so that the character can only move in one direction at one time. Being as we now have the ability to move smaller distances, it follows that we can do special moves, like diagonals. So, under each “if” block in the “foreach” loop, I’ve removed the “break;” command, and I’ve added movement numbers so that the character can move again (if you think about it, we just removed some code a second ago that allows our character to move!), so my “foreach” loop code now looks like this:

What’s that I hear you say? Where did this CheckBounds thing come from? In order to make a level, you have to make sure that your character cannot move through walls. Seeing as I’m moving my character here, it only follows that I check to see if, when I move my character, he will be inside a wall. If he will, then don’t move him! It’s as simple as that! So I’ve added a new function to my code, just above the Draw void:

The first declaration of a Rectangle (tempRect) creates a new temporary rectangle, to store where my character will end up if he does move (i.e. his next possible move). This is so I can do the test: “if character’s new position falls inside a wall, then characters new position = character’s old position” – basically making a wall a solid object which my character is unable to pass through.
Next, I’ve set up a variable tempReturn, and set it to true. So by default, if the character doesn’t fall within a wall, my character can move. Finally, I’ve got a little “for” loop, that checks if my tempRect falls within another group of rectangles. The other rectangles are defined by an array, “rects” – I’ll explain that in a moment. After that, I’ve said “if it does fall within another rectangle” then set tempReturn to false, making the character unable to move.
Then I’ve returned tempReturn to the program, so it can process the bounds-checking code appropriately.
On to the “rects” array! In order to build a level, you’ll have to use a group of shapes (rectangles in my case) to define areas that your character can’t enter. So at the top of my code, I’ve added a bunch of code.
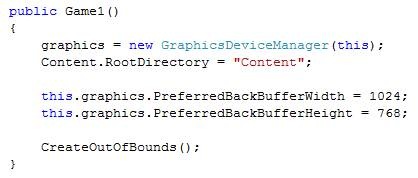
Under the “public Game1” function, I’ve added a couple of things; I’ve changed the size of my game’s window, so that the level actually fits (1024x768), and I’ve also called another void I’ve written, that creates that array of rectangles:
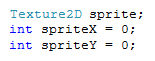
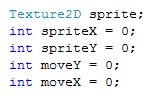
Now, before we move on to the newest void, we’ll need to set up the array so it can be accessed from anywhere in the program. To do this, find the “Texture2D sprite;” line we created earlier. I’ve added the rectangle array here, and also added a number to store how many rectangles I’m using. As well as those two, I’ve added some other stuff which I’ll explain as we go along:

Now, let’s go and create that “CreateOutOfBounds” code. Under the “public Game1” code, create a new void that looks like this:
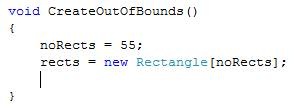
So what this does, is sets the number of rectangles stored in “rects” to 55 (0 through 54). Now we can start actually building our level! I used the standard Pacman level to create my rectangles, but you might want to start building your own level here.
So I could see where my level was falling, with respect to my chosen level, I grabbed an image of the Pacman level I wanted to use (level.bmp):
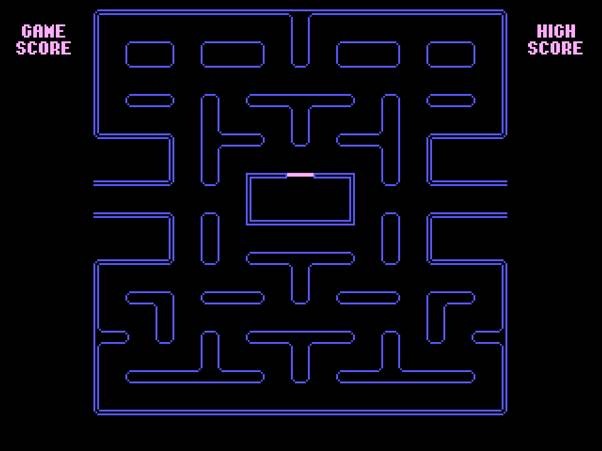
...and used it as a background on my game. I then set up a semi-transparent PNG image (rect.png):
![clip_image004[5]](https://msdntnarchive.blob.core.windows.net/media/TNBlogsFS/BlogFileStorage/blogs_msdn/ukstudentzine/WindowsLiveWriter/Creatingyour1stGame2of5byBenColeyAcademi_AF4F/clip_image004%5B5%5D.gif)
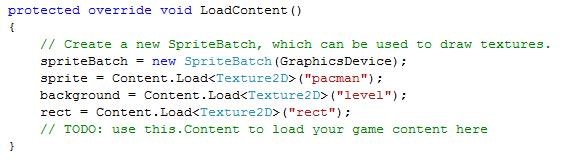
...so I could see through the rectangles, to make sure that they were falling in the right place. I then found the code where I defined my Pacman character’s image, and added the following code:
I then scrolled down to my “Draw” code, and modified it to look like this:

So as well as drawing my character here, I am now drawing my “background” image too. Under that stuff, you’ll see I’ve created another “for” loop – all this does is loops through each rectangle in my “rects” array, and draws them on the screen using the semi-transparent PNG that’s called “rect”, so I can see if they’re correct or not.
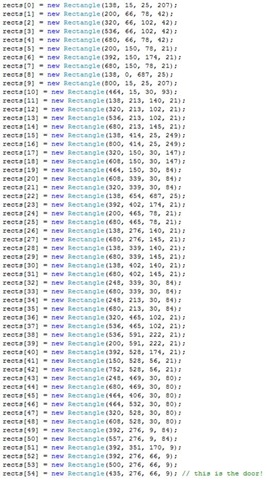
Finally, I started the process of building my level. This takes a while, but once it’s done, you feel very satisfied with the result! Go back to the “CreateOutOfBounds” code, and build some new rectangles for your game. As I mentioned earlier, I used the standard Pacman level, and after a look, I worked out I could create the bounds for this level with 55 rectangles. So I’ve manually created my 55 rectangles to build my level, like so:
And that’s it!!! If you hit F5 to run your game, you’ll now see a semi-transparent bunch of rectangles that define your game’s level overlapping your background image for the level, and you should be able to move your character around them without going through them:
Once you’re satisfied that the rectangles are okay, you can comment out the “for” loop code that resides in the “Draw” code, so that the rectangles disappear, but they’re still there to set the bounds for your game:
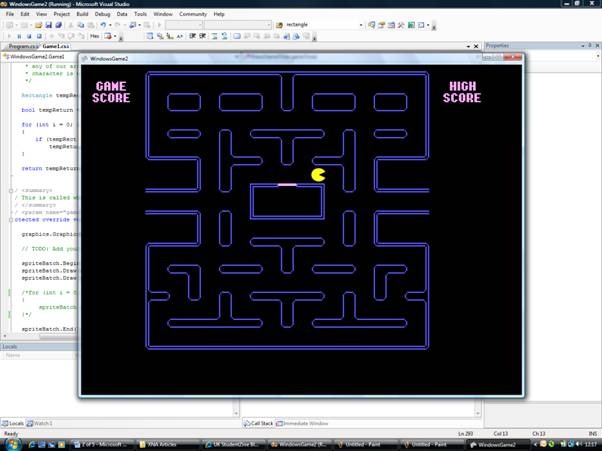
That’s it! Your level is built! Next time, we’ll look at some interaction with objects such as enemies and collectables.