You Need an alignment adjustment
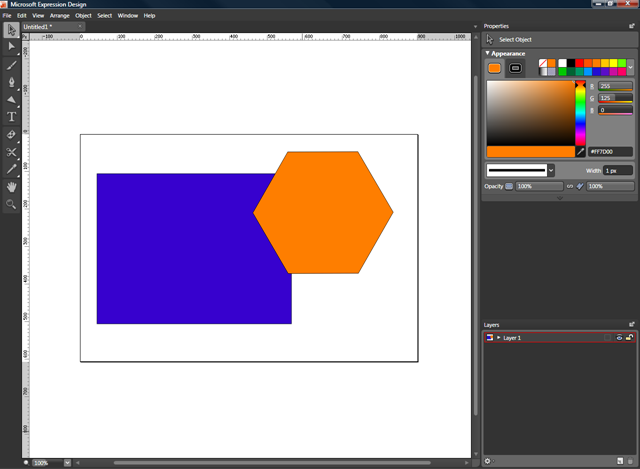
One of the first things that frustrated me about Expression Design was the (seemingly) lack of ability to align my objects and text blocks where I wanted them. After all, this seems a fairly rudimentary expectation, right? So I drew a rectangle - a nice blue rectangle. Now to align this thing to the center of my artboard. At first, I looked to the Arrange menu. Okay, there's 'Align', but it's sub-options are grayed out. There didn't seem to be a way to do this without manually clicking and dragging the rectangle to the middle of the canvas and eyeballing it. But then, after some playing around with the product I can say that all of the alignment options you need are there in the program.
There are a couple of alignment options that aren't part of the UI that I would like to see. One is how to align an object to the center of the artboard. You select your object(s), Edit, Copy (or CTRL+C) and then Edit, Paste (or CTRL+P) and the objects appear in the center of the canvas. But I can't select a single object and go to the Arrange menu and select Align, Center Vertically & Horizontally to Canvas, because that menu option doesn't exist. Neither does there appear to be an option to center horizontally or center vertically to the canvas. If you've got a really smooth hand you can use the copy, paste tick to align to the center of the artboard and then drag the object horizontally or vertically to align it, but since my hand isn't quite that steady I accomplish a single-axis artboard center by using the copy, paste trick then hold the Shift key and tap the arrow keys until the edge of the object is flush with the artboard. I've filed a bug (a suggestion really) to have a menu option to align an object to the center, top, bottom, left, right of the canvas. Aligning to the left and right is easy - all you do is click and drag the object and it snaps into place (by default the View, Snap to Guides option is enabled. If you aren't seeing the object snap to the edge of the artboard, check this option).
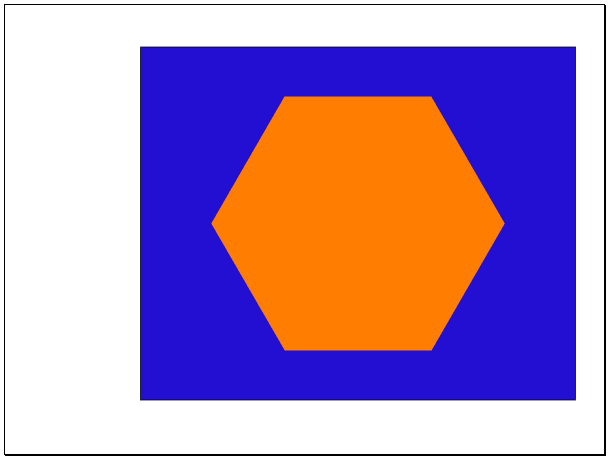
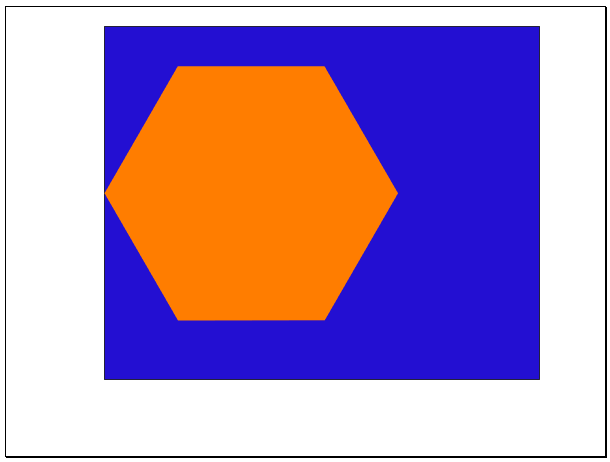
So let's now examine our other alignment requirements. Consider the following image below:
Pretty basic. We have a blue rectangle and an orange stop sign. Okay, it's a hexagon. There are no orange stop signs here in the states are there? Anyway, not to zip off on another tangent ... let's say I want the hexagon centered inside the rectangle. If you're used to using Adobe products like Flash or Illustrator then you know about the Alignment window under the Window menu item. In this window are many options for allowing you to align your objects to each other or the artboard.
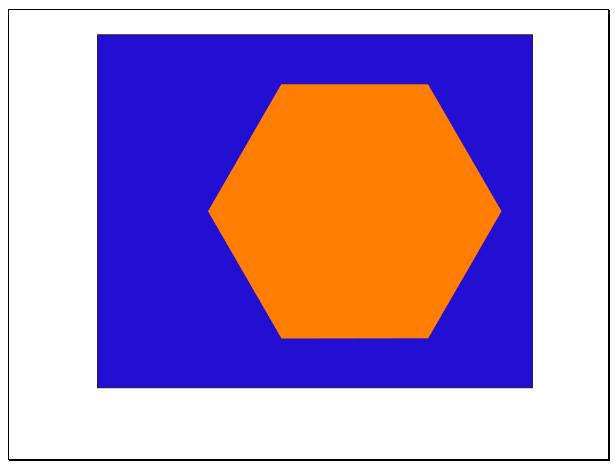
In Expression Design, the alignment options don't actually appear as part of the UI until you have two or more objects selected. In order to center the hexagon in the rectangle both horizontally and vertically I need to select both the hexagon and rectangle (shift click or click drag). Now look at the bottom of the screen. No, not that low. Look to the right of the Skew Angle and Rotate Angle adjustment boxes. You now have alignment, stack and path options available. Let's take a look at what each of these do for us. I'll use our blue rectangle and orange stop sign, er ... hexagon, as an example of each.
Centers - Objects selected are centered inside the object underneath it. What!? Think about it as if you were to set a plate on a tray and then a cup on the plate. You have a stack with three objects - tray, plate cup. Looking down on it, the tray is under the plate and the cup on the bottom of your stack. Using the centering option the cup is centered on the plate and the plate is centered on the tray.
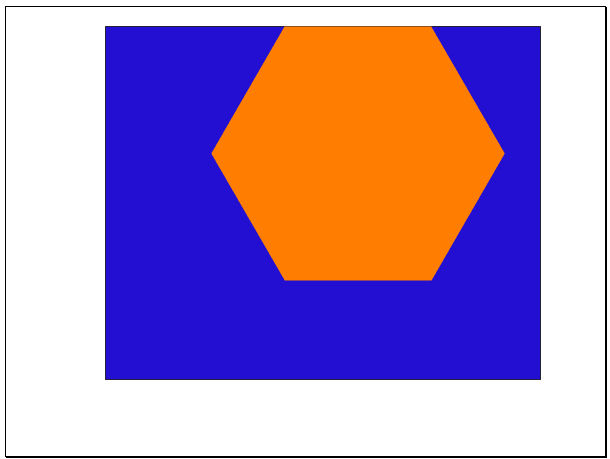
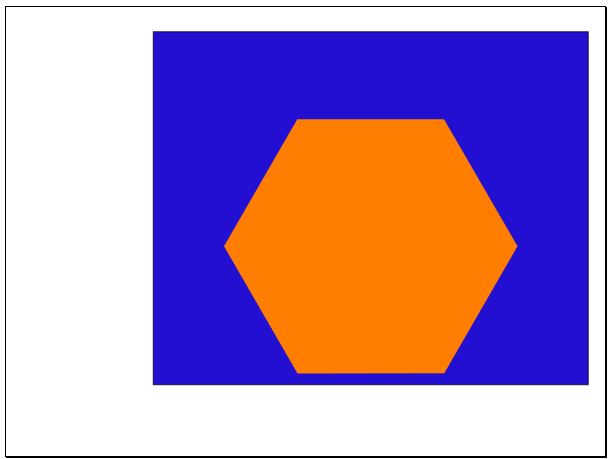
Top Edges - Each object on our stack from the top down is aligned so that the 'top' (don't think in 3D anymore) of the object is aligned to the inner-top of the object underneath it.
Bottom Edges - Each object on our stack from the top down is aligned so that the 'bottom' of the object is aligned to the inner-bottom of the object underneath it.

Left Edges - Each object on our stack from the top down is aligned so that the 'left' most point of the object is aligned to the inner-left of the object underneath it.
Right Edges - Each object on our stack from the top down is aligned so that the 'right' most point of the object is aligned to the inner-right of the object underneath it.
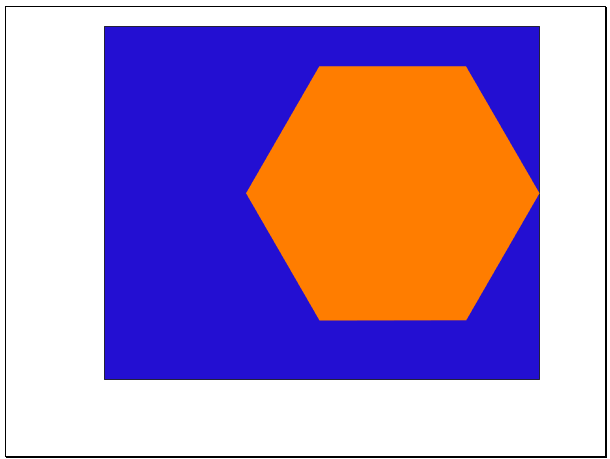
Vertical Centers - Each object on our stack from the top down is aligned so that the center of the object on top is centered along the Y-Axis of the object underneath it.
Horizontal Centers - Each object on our stack from the top down is aligned so that the center of the object on top is centered along the X-Axis of the object underneath it.
That's pretty much all there is to it, with regard to alignment options. Let me know if you have any questions. Next time we'll examine the different pathing options in Expression Design and how they look when used.